Are you a fan of the beloved Disney-Pixar film “Up”? Do you find yourself captivated by the whimsical and charming house that Carl and Ellie shared in the movie? If so, you’re not alone. The iconic Up House has become a symbol of love, adventure, and imagination for many. And what better way to pay tribute to this heartwarming tale than by creating your very own Up House drawing? In this blog post, we’ll share 7 simple and easy techniques for drawing the Up House that will make you feel like a true artist in no time.
Understanding the Basic Structure of an Up House
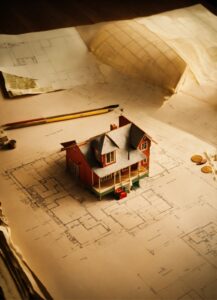
Let’s kick things off by getting acquainted with the charming structure of the Up House. Before you unleash your pencil on the paper, spend some time soaking in the unique features of the house. As your eyes glide over the images, note the balloon-like structure with its larger bottom and the petite attic perched on top. Don’t miss the arched roof and the strategic placement of the doors, windows, and that unmistakable chimney. This isn’t just a casual glance; this is your blueprint, your guide to bring this lovable structure to life on paper. Investing time here in your preliminary study will act as a compass during your drawing journey, keeping your sketch on track and making the process seamless. So, let’s dive into the whimsical world of Up House and let its architectural charm guide your strokes.
Getting the Right Drawing Tools

Before you embark on your artistic endeavor, let’s ensure you have the right tools for the job. Crafting a captivating Up House drawing doesn’t demand an art store’s worth of materials. Indeed, the beauty of drawing lies in its simplicity – the magic you can create with just a few basic items. All you need is a good set of pencils with varying degrees of hardness, a sturdy eraser, a sharpener to keep your tools on point, and a sheet of quality drawing paper. The right pencils will enable you to give your drawing the depth and texture it deserves. And using high-quality paper can prevent any unwanted smudging, ensuring your artwork remains pristine. So gather your tools and let’s get ready to breathe life into your Up House drawing.
Sketching the Foundation
With your tools all set and ready, it’s time to roll up your sleeves and start sketching the fundamental structure of your Up House. The first strokes of your pencil set the stage for everything that follows. Initiate your creation with a simple rectangular outline for the house’s lower section. This will serve as the robust base of your drawing. Above it, sketch a smaller rectangle for the attic, reminding yourself of the balloon-like structure you noted during your study.
At this stage, don’t put pressure on yourself to achieve absolute perfection. This is your canvas where experimentation and creativity have free reign. Start with gentle, light strokes. Why? Because these allow you to erase and tweak your sketch with ease, adapting as you progress.
Remember, Rome wasn’t built in a day, and your Up House won’t be either. So, take your time, enjoy the process, and watch as the foundation of your Up House starts to form on the paper. Embrace the journey as your sketch starts to mirror the charming structure you fell in love with. Let’s draw on, shall we?
Drawing the Doors and Windows

With the foundational structure in place, it’s time to invite some more detail to the party. Picture the door of the Up House, standing charmingly in the center, ready to welcome Carl and Russell on their grand adventure. Visualize the windows, scattered whimsically around, housing dreams and memories.
As you begin to capture these elements in your sketch, remember the importance of symmetry and proportion. You want your Up House to stand sturdy and balanced, so take the time to measure and compare.
As you sketch the door, keep in mind its quaintness and how it anchors the whole house. Then, switch your focus to the windows. The Up House isn’t shy about showcasing its windows – they’re sprinkled all around, inviting the outside in.
While you’re filling in these details, keep your strokes soft and light. This allows room for any necessary adjustments as you go. You might decide a window needs adjusting or the door could use a little tilt. Keeping your lines flexible at this stage lets you play around and adjust as needed without any major do-overs.
So, take a deep breath, grip your pencil, and let it dance on the paper, creating doors and windows that are just waiting to be opened. It’s all part of the thrilling process of drawing, where every stroke brings your Up House closer to life.
Adding Details to the Up House

Now comes the part where your Up House really starts to take shape. It’s time to allow those previously soft strokes to take on a more assertive presence. The key to transforming your sketch into an inviting, dimensional piece of art lies in the tiny details. The chimney, which peeks out from the roof, the welcoming stairs leading to the front door, and the cozy porch that adorns the house – all these features contribute to the unique charm of the Up House.
This is the moment where you get to play architect, adding elements like the individual wooden planks that add character to the house’s exterior. Try visualizing the soft glow of the interior, as seen through the windows, and capture it by sketching curtains that add a homey touch.
Remember, each of these features is a significant cog in the overall machine, enhancing the realism and depth of your drawing. So, grasp your pencil confidently and watch as the gentle strokes begin to morph into a beautiful, detailed piece of art, every line a tribute to the delightful complexity of the Up House. There’s no rush – take your time to imbue your sketch with all the enchanting details that make the Up House a symbol of adventure and hope.
Coloring Your Up House Drawing

With the framework and intricate details in place, it’s time to breathe life into your Up House drawing by splashing it with color. Embrace the delightfully bright palette that is characteristic of the Up House. Embark on this coloring journey by applying the lighter hues first. This forms a wonderful base upon which you can layer deeper shades, mirroring the original’s vibrant aesthetics.
However, while applying color, it’s essential to be mindful of the boundaries established by your sketches. Keeping within these lines is key to maintaining the clarity and neatness of your drawing. Imagine yourself as a meticulous painter, adding to a tapestry with each stroke. Each hue you apply further infuses your Up House with personality and warmth.
So go ahead, let your coloring tools glide over the drawing, filling in the cheerful yellows and blues that adorn the Up House. Remember the rustic reds that color the roof and the lovely greens of the doors and windows. Let the color seep in and transform your Up House drawing from a monochromatic sketch into a vibrant embodiment of joy and adventure. With every color you apply, you’re one step closer to completing your masterpiece. Now, aren’t you excited to see how it turns out?
Polishing Your Drawing

As the final step on this artistic journey, it’s time to fine-tune your Up House masterpiece. Remember, attention to detail is key. Start by checking the overall drawing for any rough strokes that need softening or smudging. Then, with your trusty eraser at hand, eliminate any redundant lines that may have escaped your notice earlier. This is also the moment to ensure that each carefully added detail – from the chimney to the windows – stands out clearly. Your Up House should appear sharp and well-defined, with every unique feature visibly contributing to its overall charm.
But, the embellishment doesn’t need to stop here! Feel free to give your drawing a fuller context. Perhaps a backdrop of a clear, sunny sky? Or a lush, blooming garden surrounding the house? Maybe even add in some of the floating balloons from the movie, bringing even more color and cheer to your piece. These added touches will make your drawing not just a standalone structure, but a snapshot of a world filled with adventure and whimsy, just like the Up House itself.
After these final touch-ups, take a moment to step back and admire your completed piece. It’s not just any drawing, but a personal rendition of one of Pixar’s most beloved architectural marvels, filled with your unique artistic flair. So go on, give your drawing that final polish, and revel in the accomplishment of your very own Up House Drawing!
Conclusion
In summary, these 7 step-by-step Up house drawing tutorials offer a wide range of approaches for artists of all skill levels.
Whether you prefer a more realistic or whimsical style, there is a tutorial to suit your taste.
The diverse techniques and tips provided in these tutorials will inspire you to create your own unique version of the iconic Up house.
So, get your pencils ready and start experimenting with perspective, shading, and colors to bring this beloved house to life on your canvas.
Happy drawing!


One Reply to “7 best up house drawing step by step”